




How can you see beyond the diffraction limit while keeping your cells alive? In this first Quick Knowledge, we start with standard laser scanning confocal microscopy and its pinhole trade-off. We then show how REscan sends the emission light onto a sensitive camera, so it collects more light without losing resolution. Finally, we explain how a larger REscan amplitude improves resolution by 1.4x.
Here's standard laser scanning
confocal microscopy (LSCM)
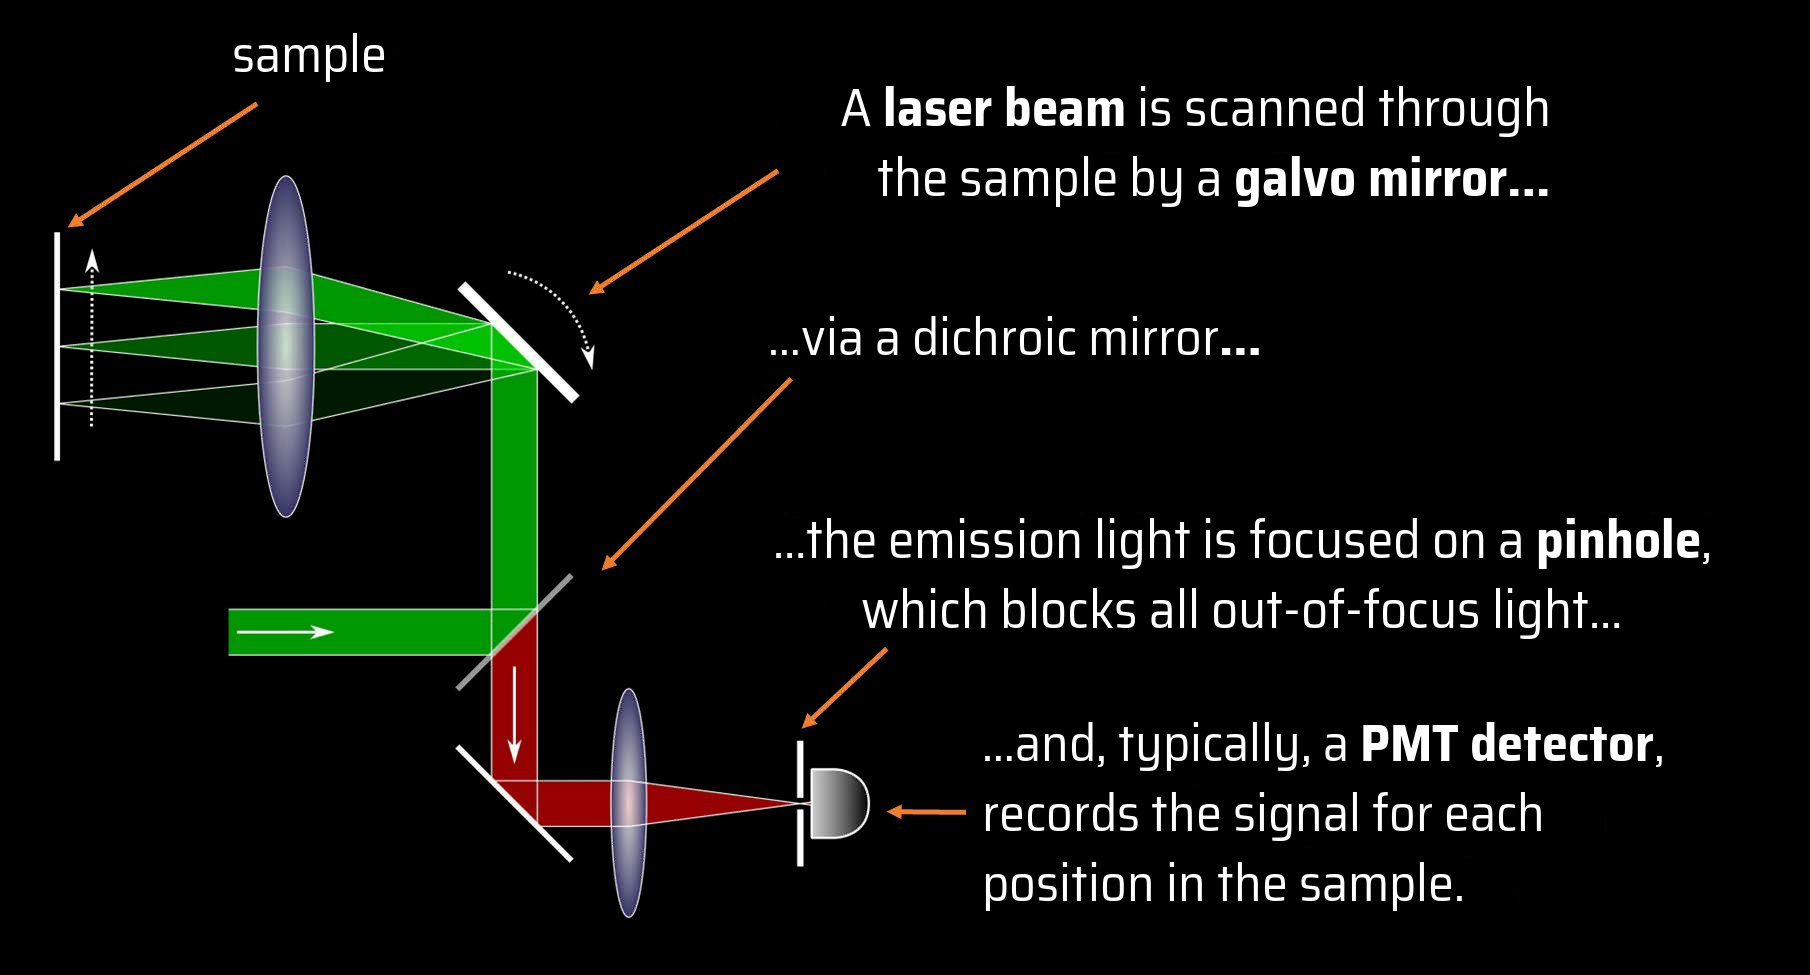
From the detector signal at each position, an image
of the sample is calculated.
In REscan microscopy,
we REthink confocal technology
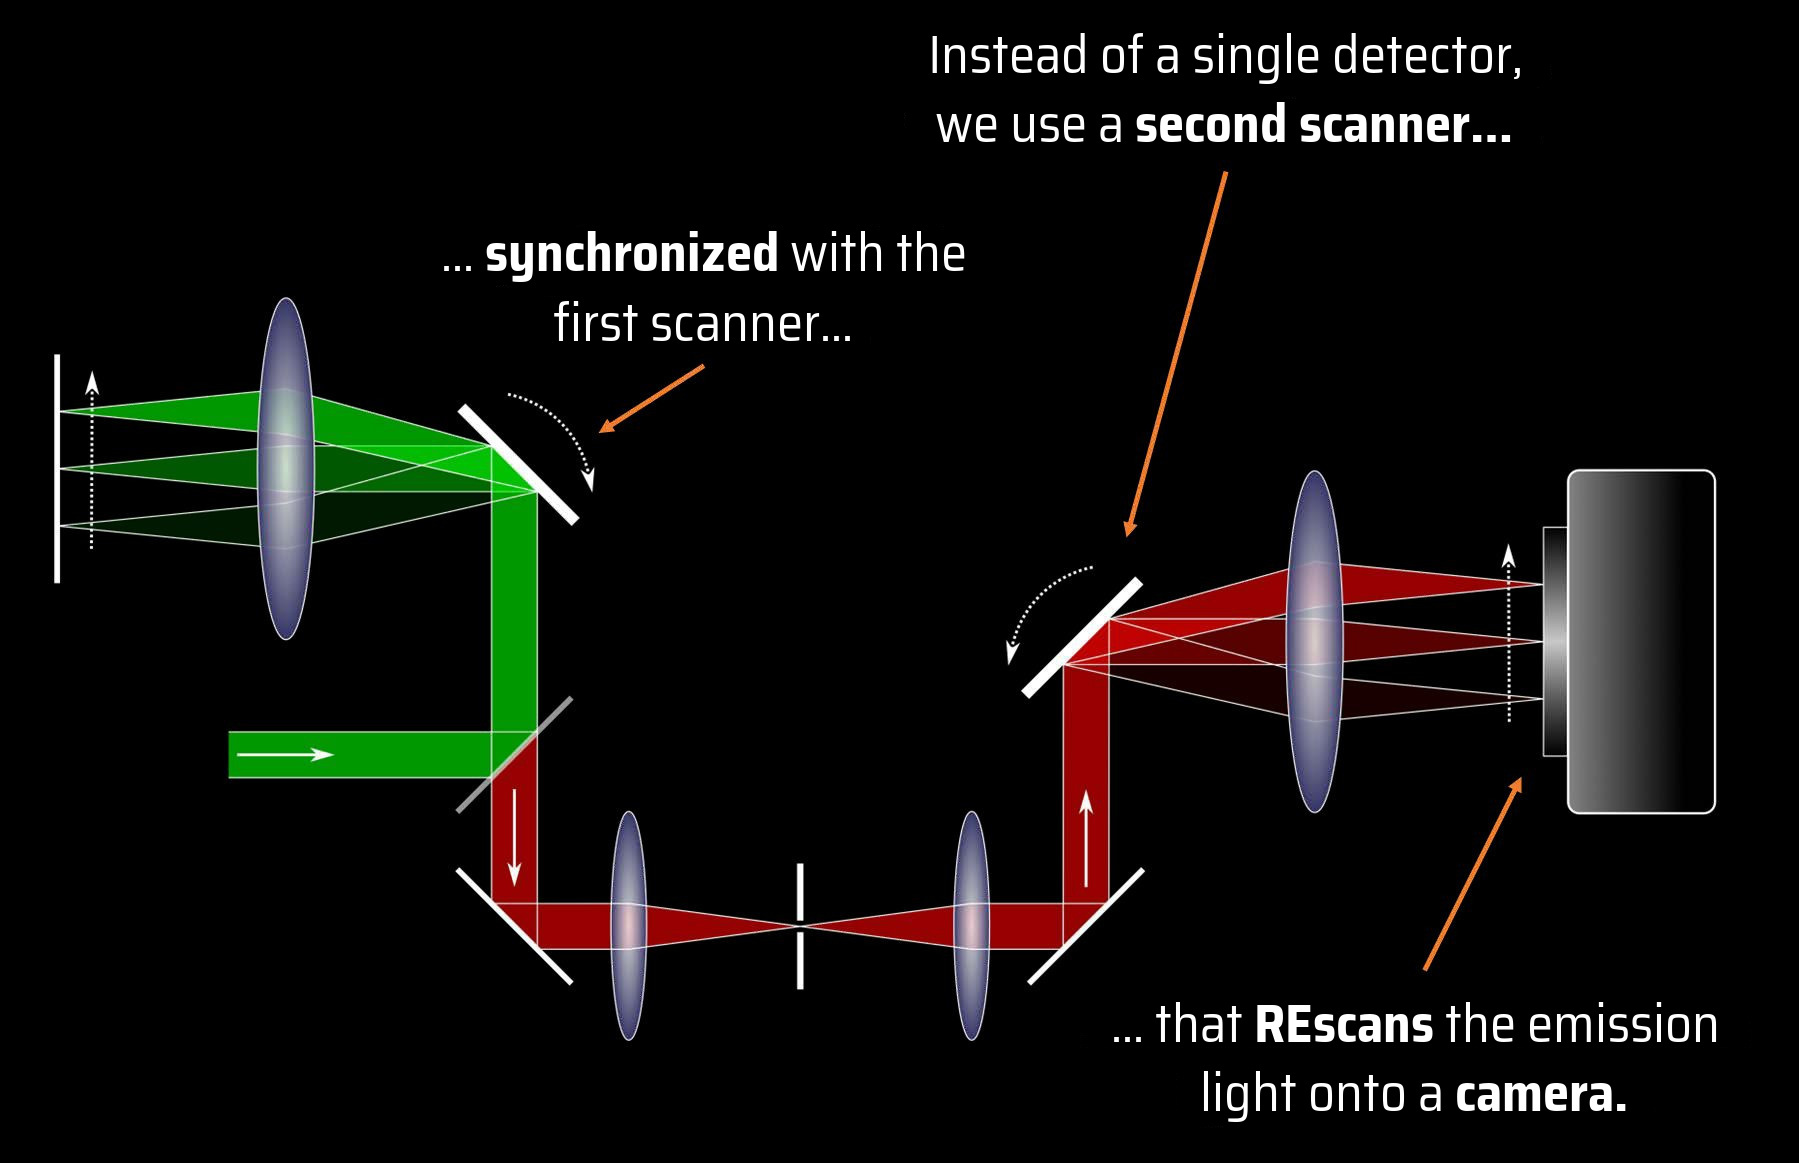
The signal automatically ends up at the right place on the
camera, and the image is reconstructed all by itself.
REscan confocal has extra
sensitive detection
REscan uses sCMOS camera as detector
Compared to PMT detectors, sCMOS have a higher quantum
efficiency in a wider wavelength range…
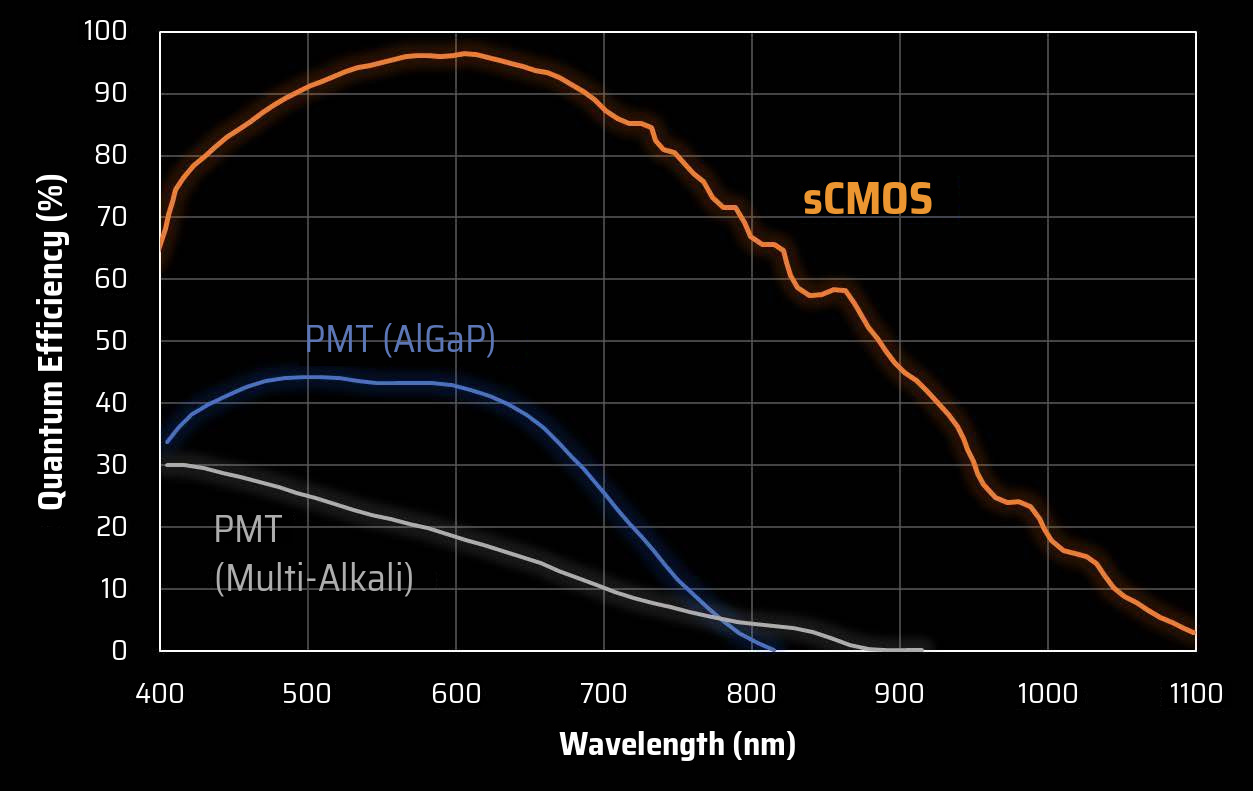
…and, most importantly, they have pixels.
Here is why pixels are cool…
REscan collects more light
without losing resolution
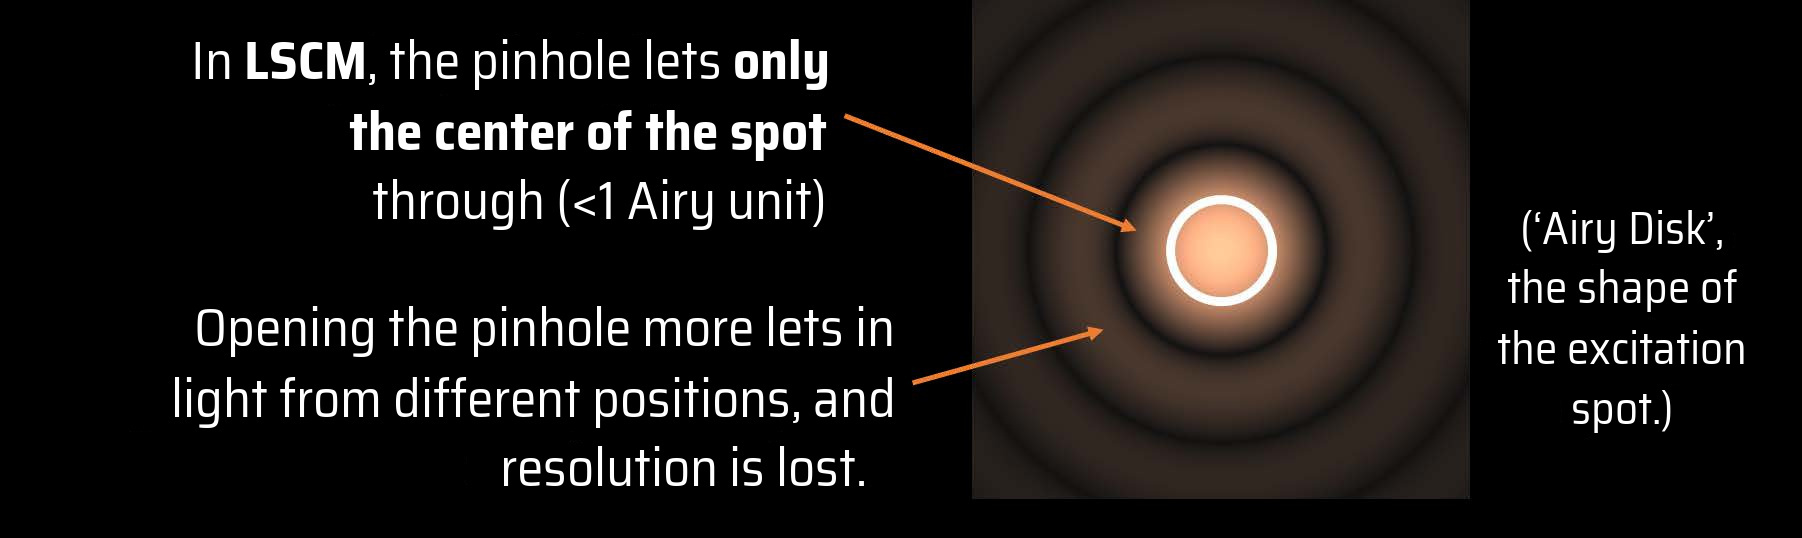
When the light is
REscanned on the
camera, each part of the
spot automatically ends
up in the correct pixel.
And the pinhole
stays wide open to
collect more light
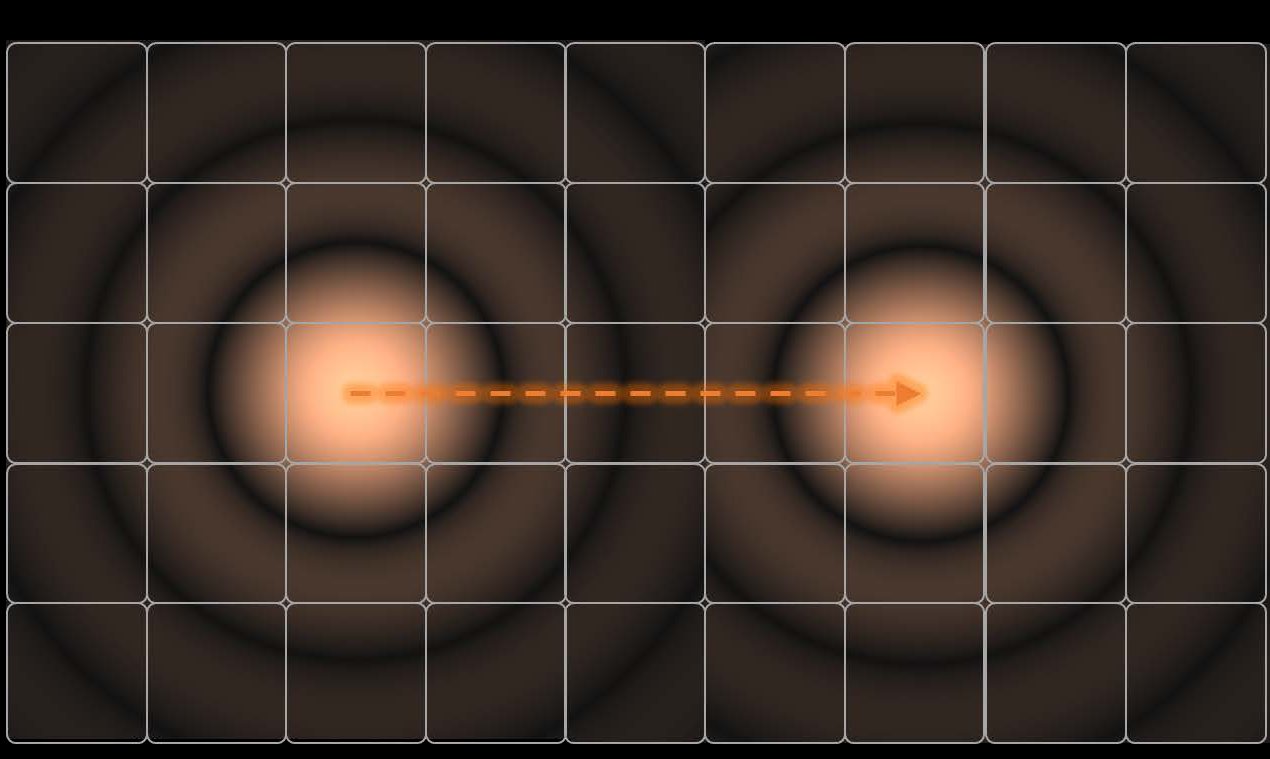
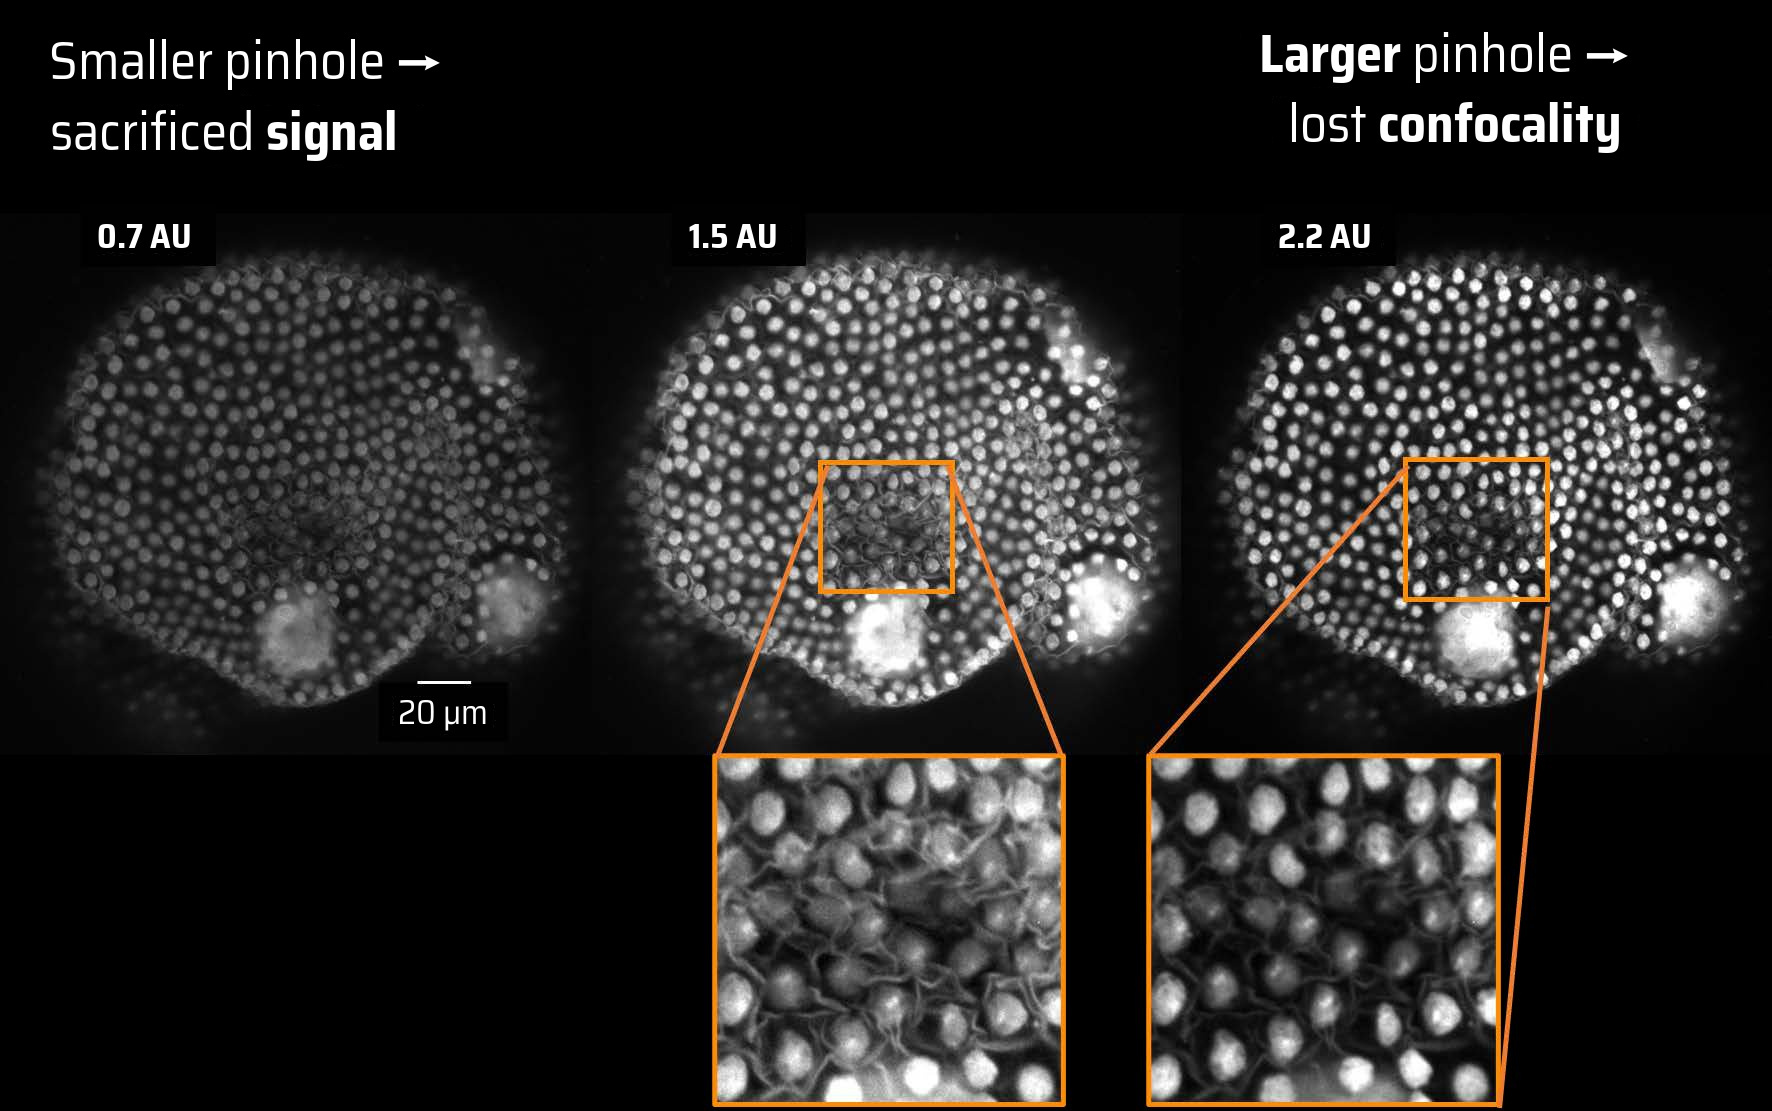
The optimal pinhole size in
REscan confocal microscopy?
A pinhole between 1 and 2 Airy units (AU)
gives the best image
With REscan you can
image in Super Resolution
In REscan, image magnification and spot size are decoupled
We can magnify the image compared to the spot by giving
the REscanner a larger amplitude than the scanner.
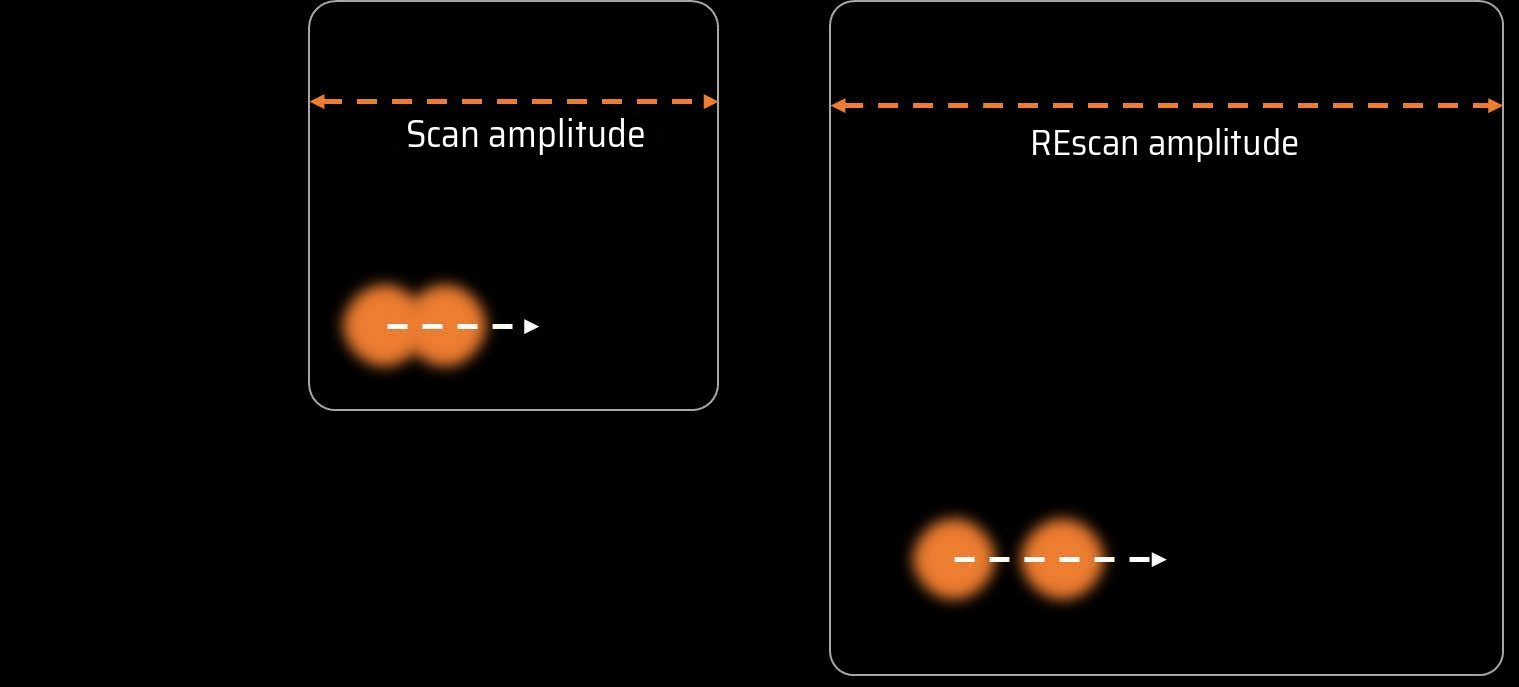
In REscan, all the details in the
image are pulled further apart.
Twice as large REscan improves resolution by 1.4x, breaking the
diffraction limit.
Download the quick knowledge
Receive more information about this knowledge article.